MiniMax H3 Image Prompts for Multiple Reference Images
Use multiple reference images in MiniMax H3 Image. Assign each image a role, copy three editing prompts, and troubleshoot changes to faces, products, and layouts.
You have three pictures for a new product shot. One shows the speaker you sell. One is a close-up of woven fabric. One shows the kind of light you want. If you ask MiniMax H3 Image to “combine these,” it has to decide whether the second image is a material, a new object, or the backdrop. Name the decision in the prompt. You want the speaker from one image, fabric from another, and only the lighting from the third.
Give each reference a job. Start with the picture that owns the subject or the existing composition, then add a reference for each decision it cannot answer. MiniMax's image edit API accepts 1–16 references. In the local workflow documented in the model repository, <Picture 1> refers to the first uploaded image, <Picture 2> to the second, and so on.
If you are still picking an interface, the MiniMax H3 Image model guide covers the browser, desktop, and API routes. Check the image order shown in your chosen interface before you paste a prompt.
Choose the source for each detail
| What you want to make | Start with | Add a reference when |
|---|---|---|
| One edit to an existing picture | The image you want to edit | The replacement object or material has a specific look you need to match |
| A new scene with the same product | A clear photo of the exact product | You need the texture, lighting or composition from another image |
| A new shot of the same character | One clear face or character reference | A separate image adds an outfit, pose or view you cannot see in the first |
| A room or scene with several items | The layout image, if you have one | Each added file supplies a distinct object or a missing view |
For a catalog edit, start with a sharp photo that shows the product's outline and controls. The texture reference can be a crop of the fabric itself. If the lighting reference features another speaker, crop that speaker out when possible. Then describe what you need from the image in the prompt. That gives the model fewer competing candidates for the main subject.
A group of references can have a shared job. Two angles of the same bag can establish its front and side. If one bag is a different colorway or has different hardware, pick the version you want to preserve and call it out by number.
Use this prompt structure
Write the deliverable in the first sentence. Then name the reference, its role and the parts that carry forward. Put the final framing and any precise text at the end.
Create [one deliverable] for [where it will be used].
Use <Picture 1> as the source for [subject identity or base composition].
Preserve [specific features visible in Picture 1].
Use <Picture 2> for [one trait] and apply it to [named part].
Use <Picture 3> for [one trait that affects the scene].
Change [the requested elements].
Keep [the rest of the image or subject details] as described above.
Final composition: [framing, placement, and any exact visible text].
Remove the lines for any images you have left out. If you rearrange or replace a file, recheck its number. The brackets in the template mark what to fill in. Keep the angle brackets in the documented local workflow. MiniMax's hosted API examples use plain labels such as “image 1” and number the files in upload order. In a browser tool, follow the image labels shown in that interface.
Give output settings their own step. If the interface offers an aspect-ratio control, select the ratio there. For a first pass, use one output and a draft size such as 2K where available. Inspect that first image to evaluate the references and composition, then check the details again at the final size.
Three copyable MiniMax H3 Image prompts
The examples below specify the inputs and the result to look for. Use your own images in the order listed.
1. Keep the product, change the material and lighting
I made three reference images for this test and uploaded them in this order.
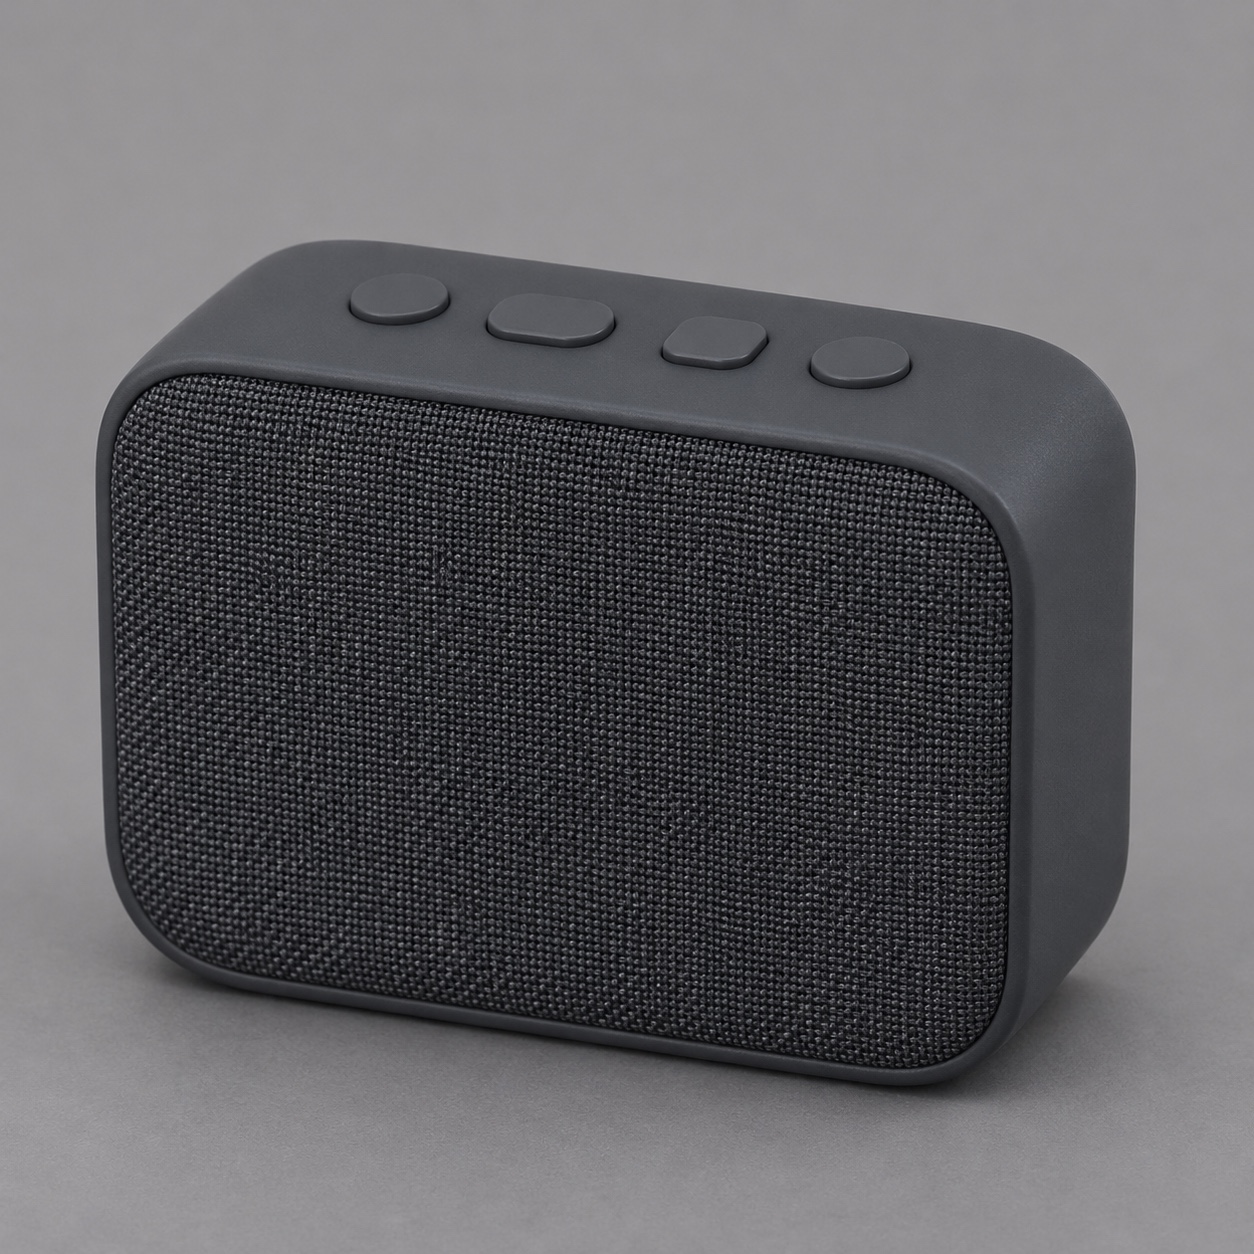


Create one square ecommerce hero image of the portable speaker in <Picture 1>.
Use <Picture 1> for product identity and the three-quarter view.
Preserve the body proportions, corner radius, button count, and button positions.
Use <Picture 2> only for the fabric texture on the front grille.
Keep the rest of the enclosure matte slate.
Use <Picture 3> only for the walnut surface and warm upper-right light.
Show one speaker with space around all edges and a natural contact shadow.
Keep the product and background free of lettering.
What the product test produced
I ran the prompt above once with MiniMax H3 Image Edit. The test returned one 2048 × 2048 image in a recorded 20.05 seconds.
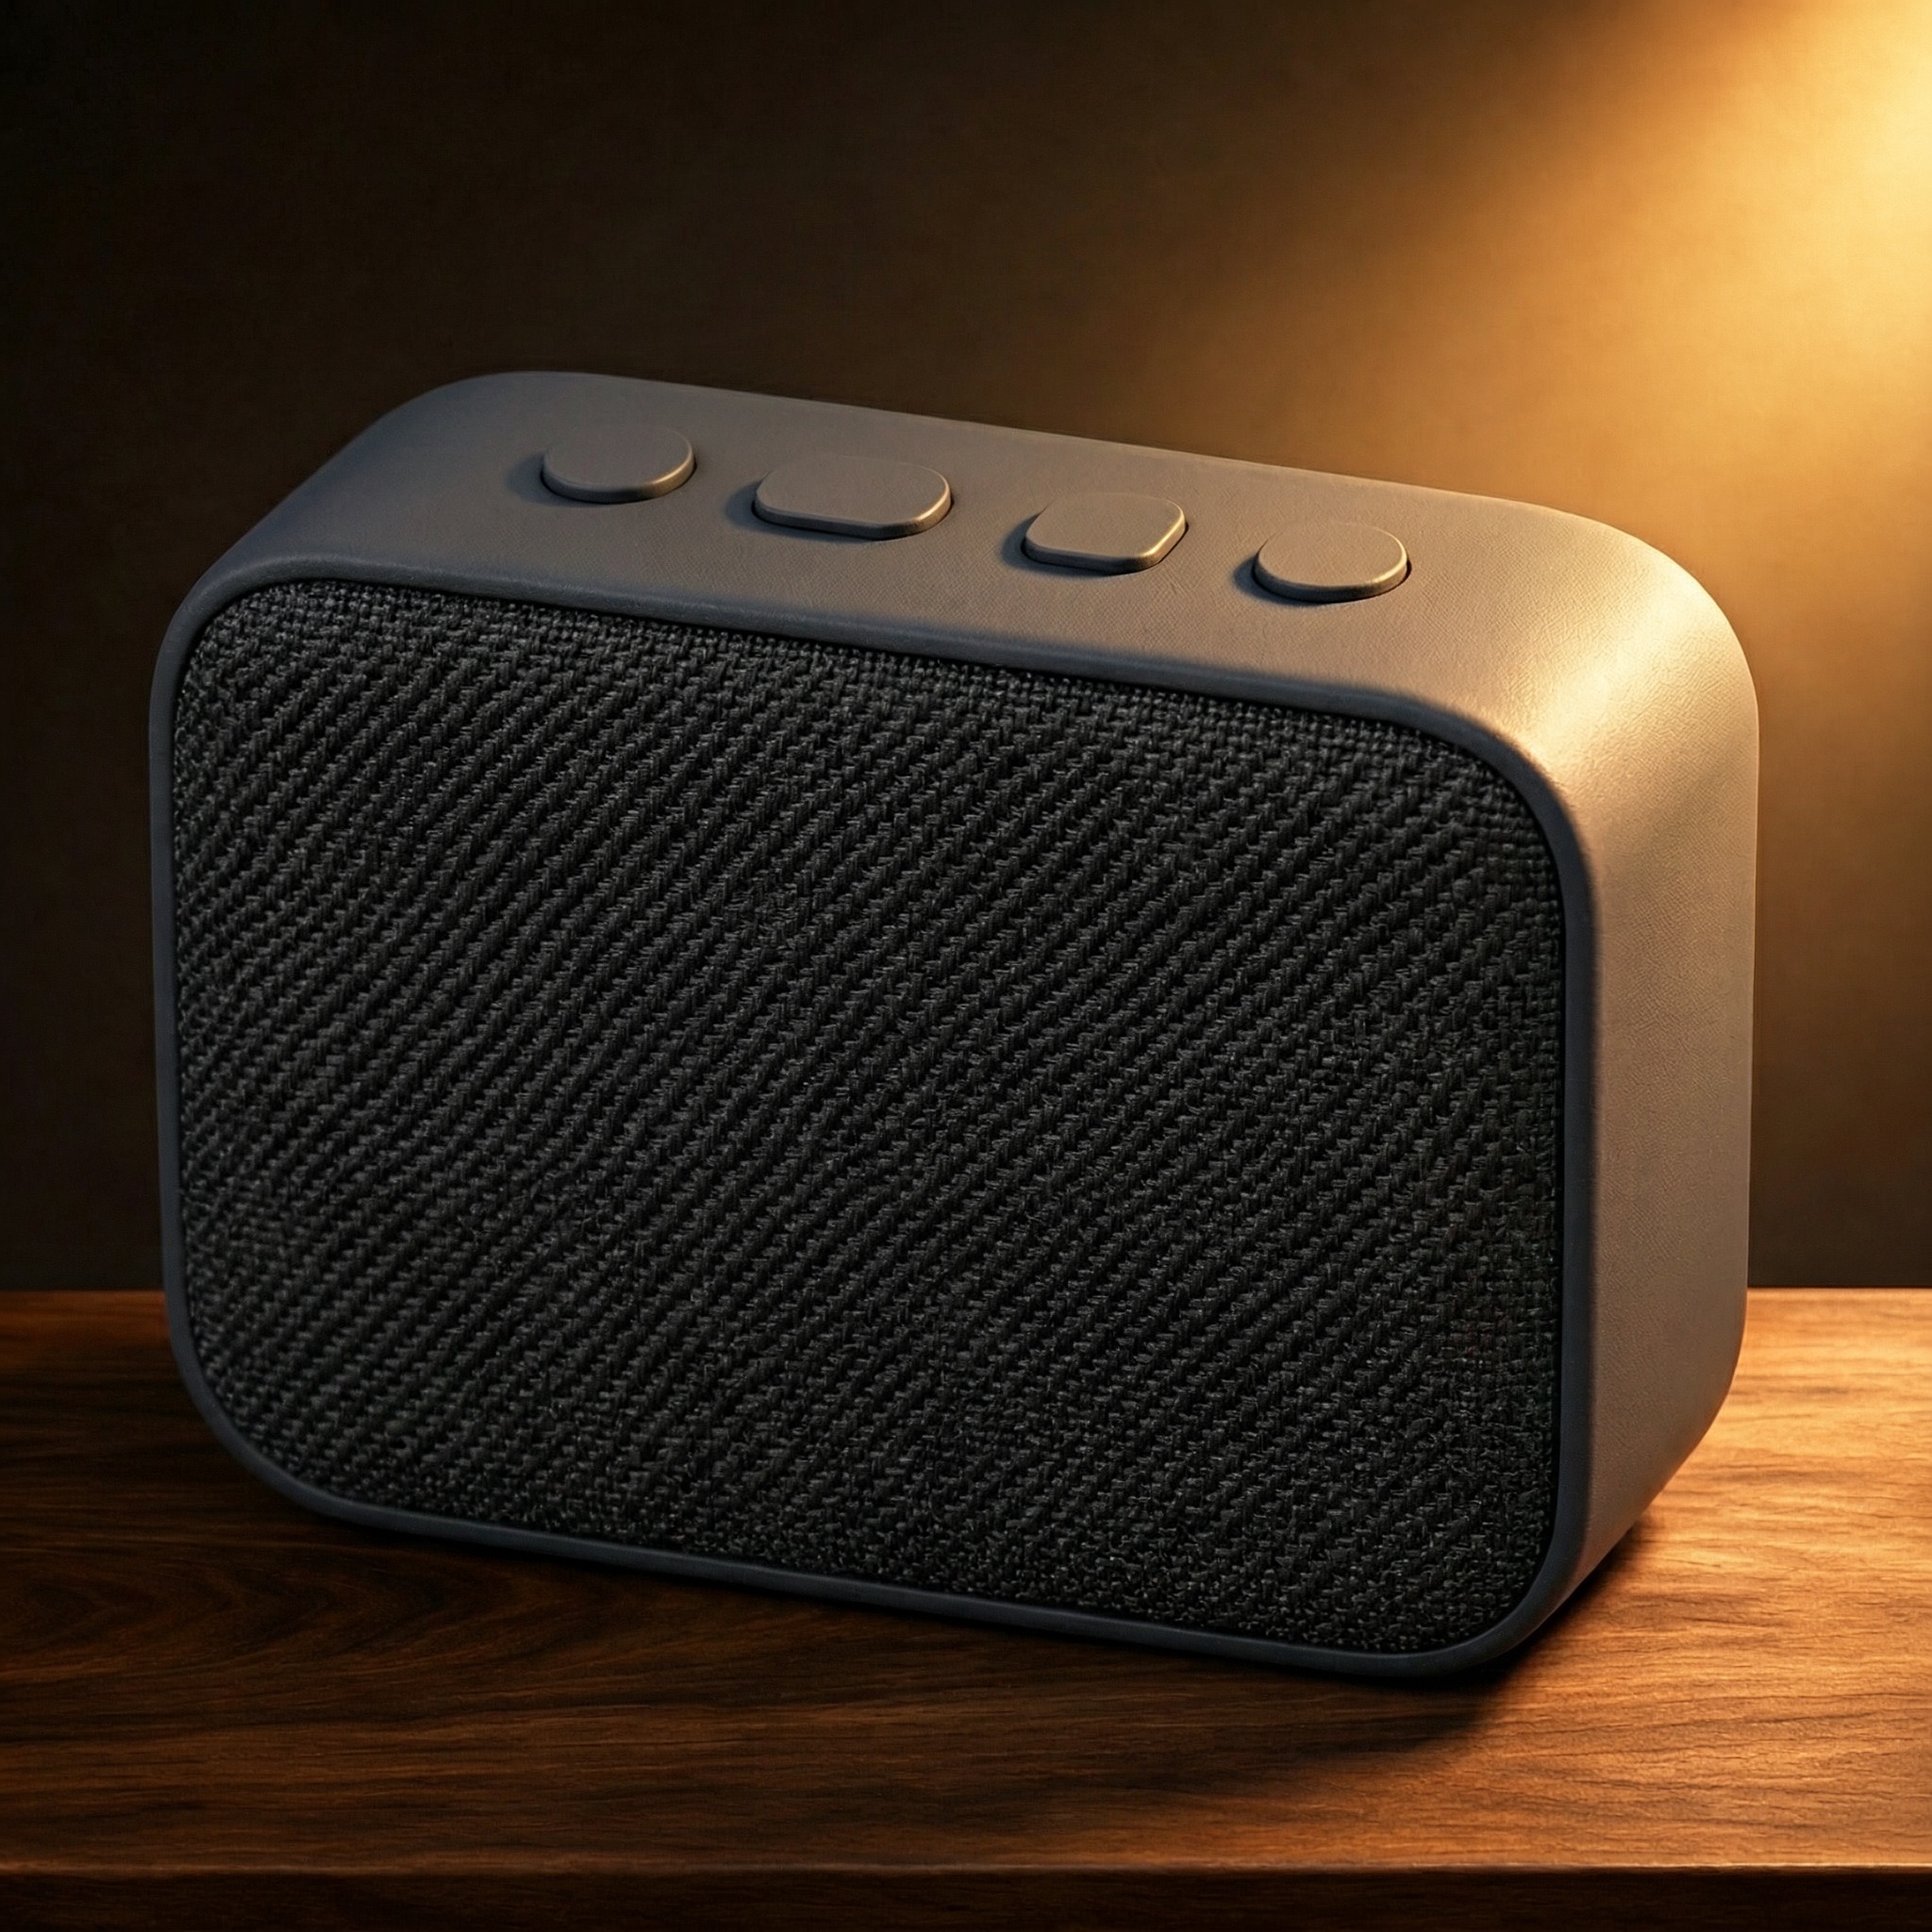
The speaker kept its rounded outline, three-quarter view, and the order of its four top buttons. The walnut table and warm light from the upper right came through, including a bright highlight on the right edge. The grille stayed inside its frame, but the weave reads as diagonal bands. The fabric swatch has a crosshatched basket weave. For a listing where buyers need to see the actual fabric, I’d compare a close crop with the swatch before using the generated image.
Check the silhouette and button positions before judging the lighting. If the controls have moved, remove the studio image and its <Picture 3> instruction. Keep the product and fabric references and describe a plain tabletop and light in words. Once the product holds, add the studio image and its instruction back together. Inspect the final grille at full size for weave that spills onto the housing.
2. Keep a character recognizable across scenes
Upload in this order:
- A clear portrait of an original adult character with a short side-parted haircut.
- A separate reference showing a rust-colored jacket with a stand collar.
- A wide reference for a rainy greenhouse at dusk.
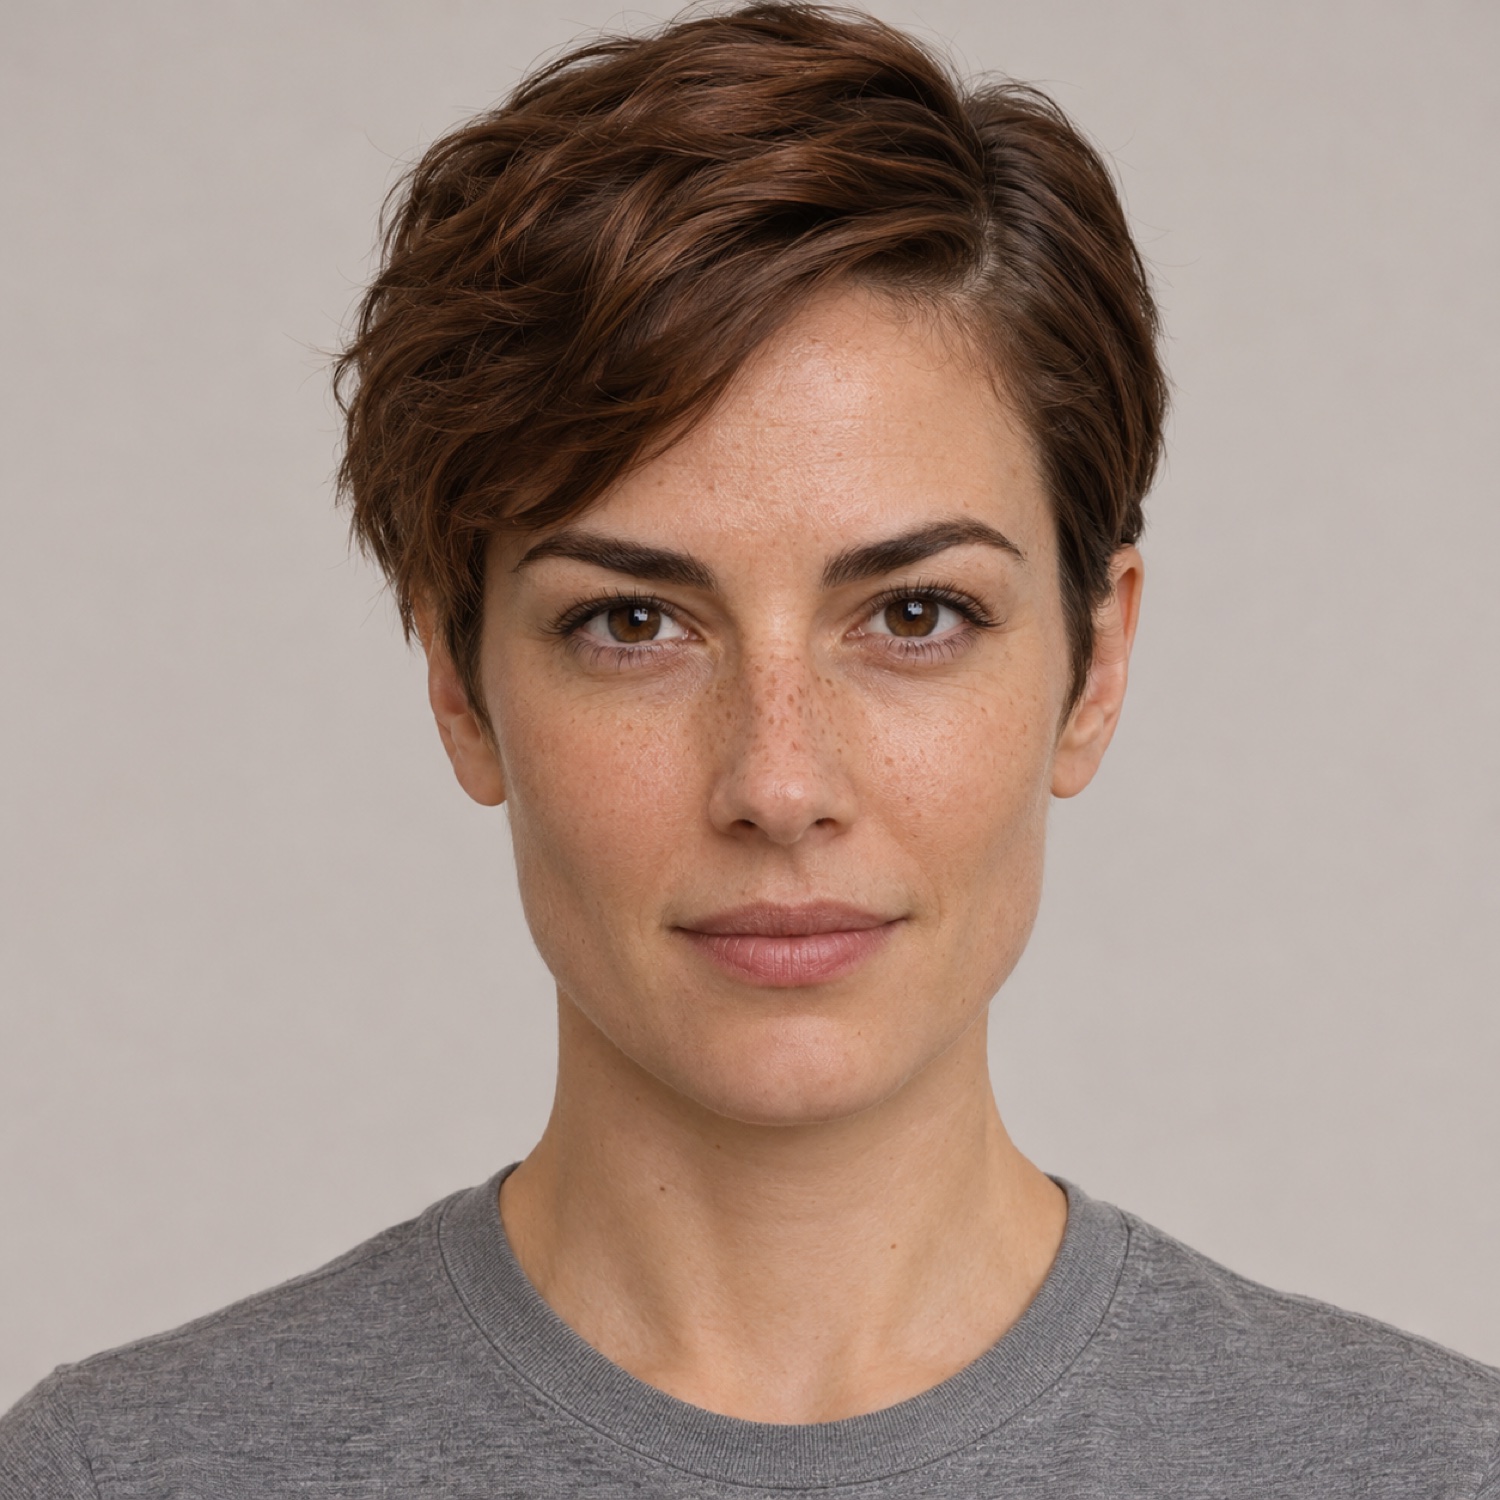
Image 1 · Portrait
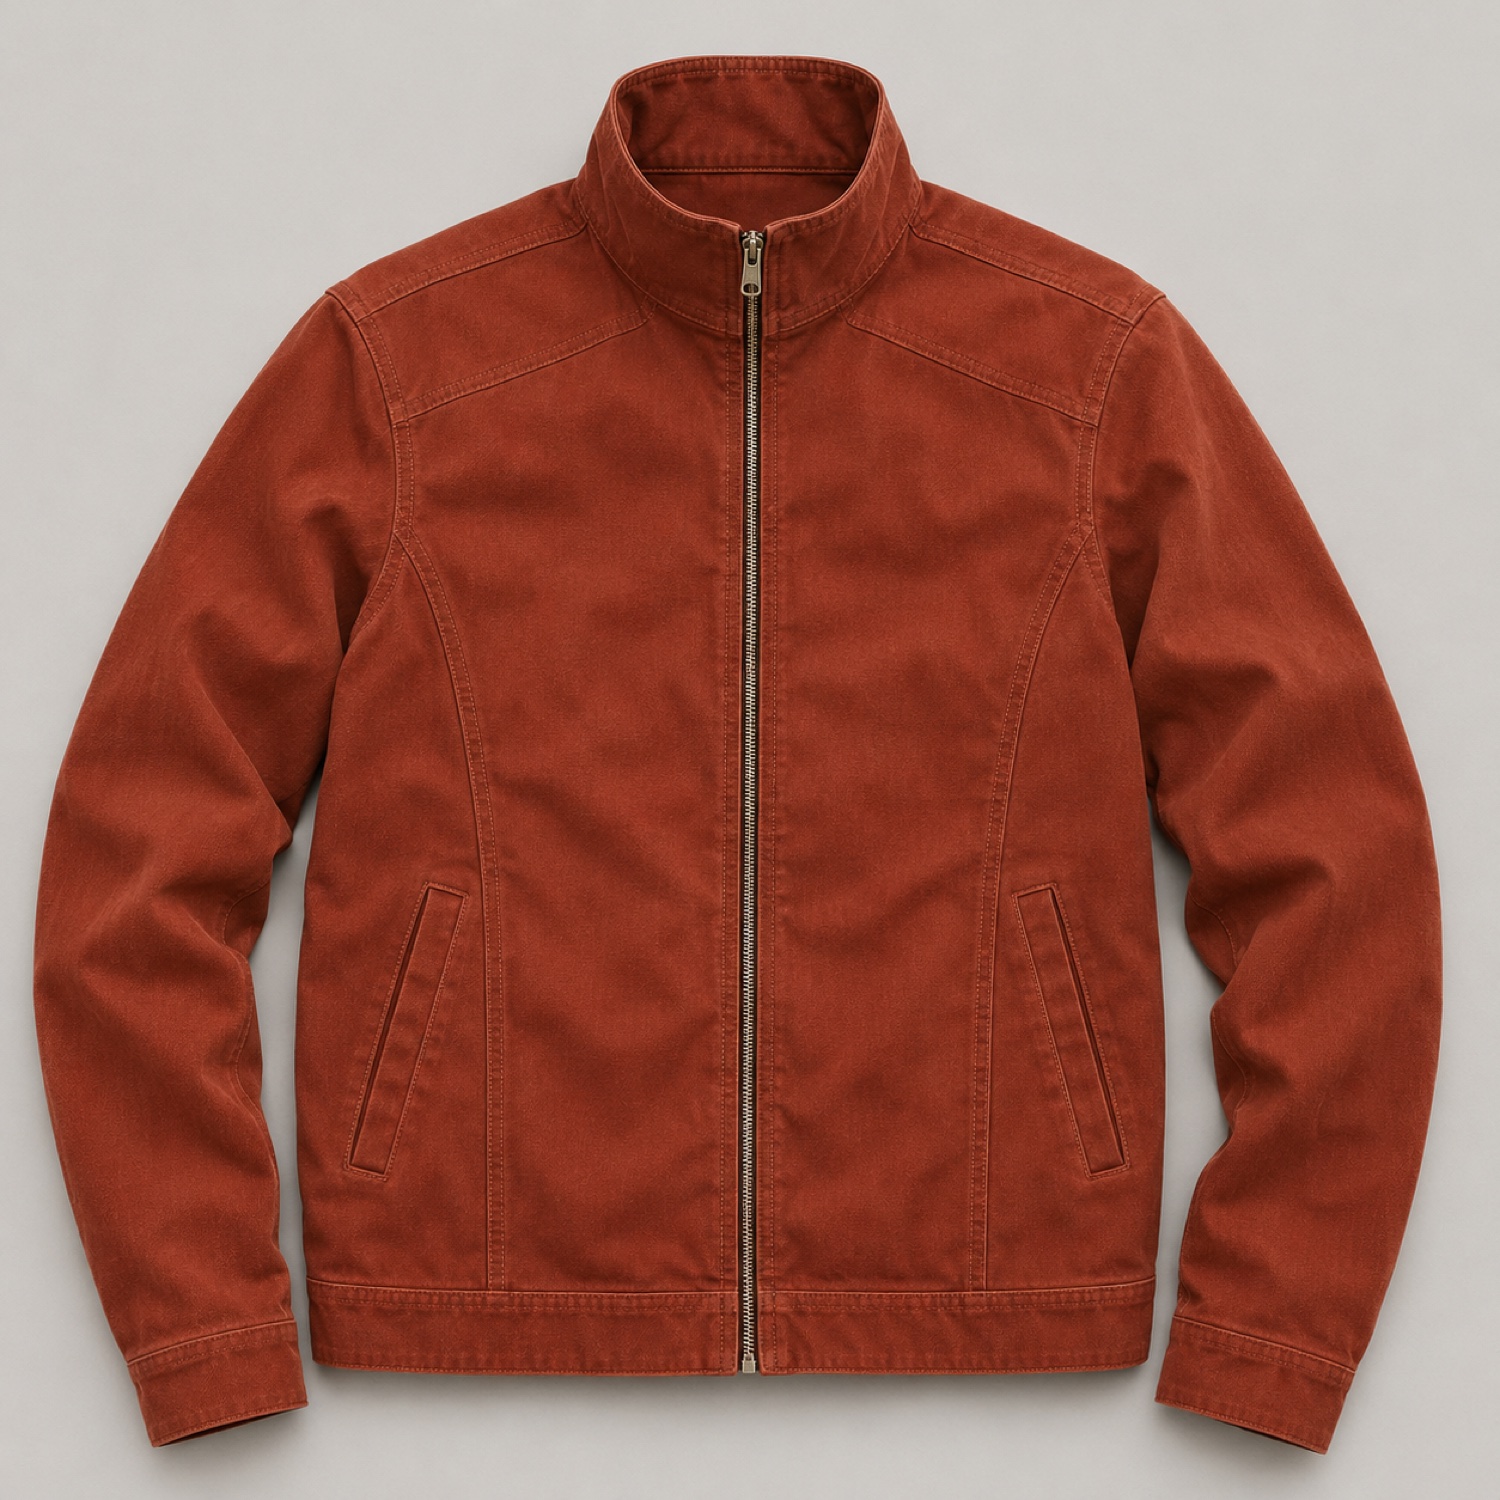
Image 2 · Jacket
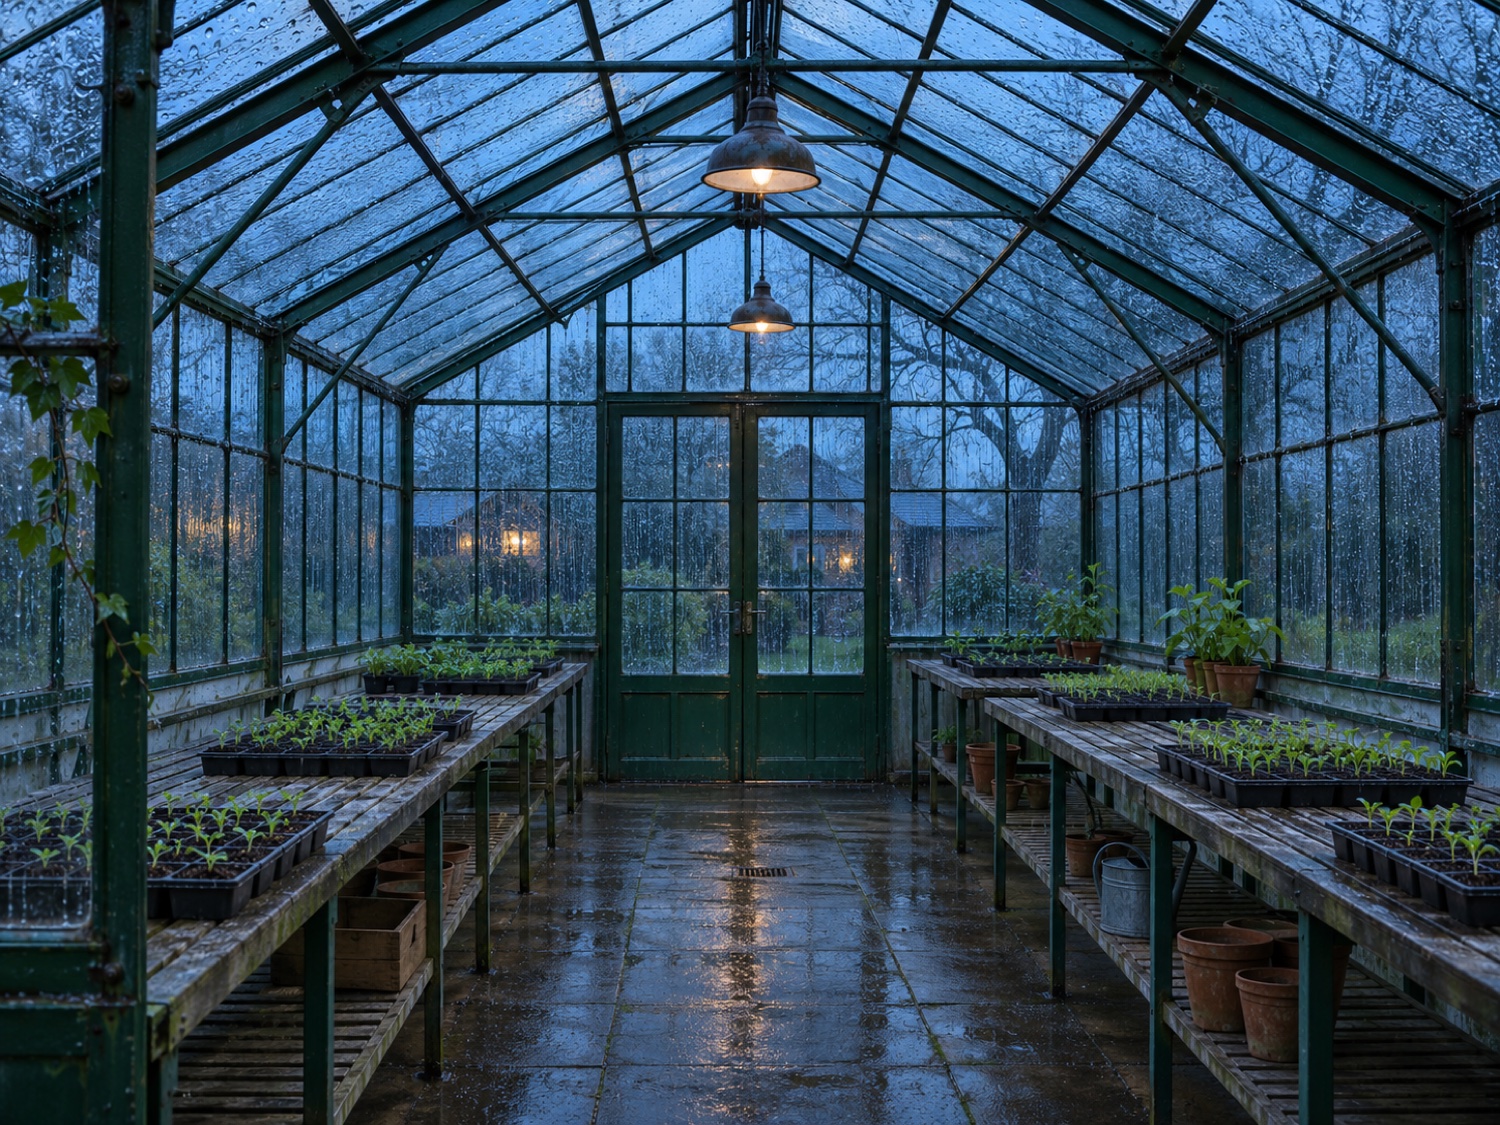
Image 3 · Greenhouse
Create one waist-up storyboard frame of the character from <Picture 1>
holding a small seed tray in a greenhouse.
Use <Picture 1> for facial proportions, haircut, and the direction of the hair part.
Use <Picture 2> only for the jacket cut, stand collar, and rust color.
Use <Picture 3> for the greenhouse structure and cool dusk lighting.
Set the camera at eye level. Keep the face and hands readable.
Leave enough room at the right edge for a crop.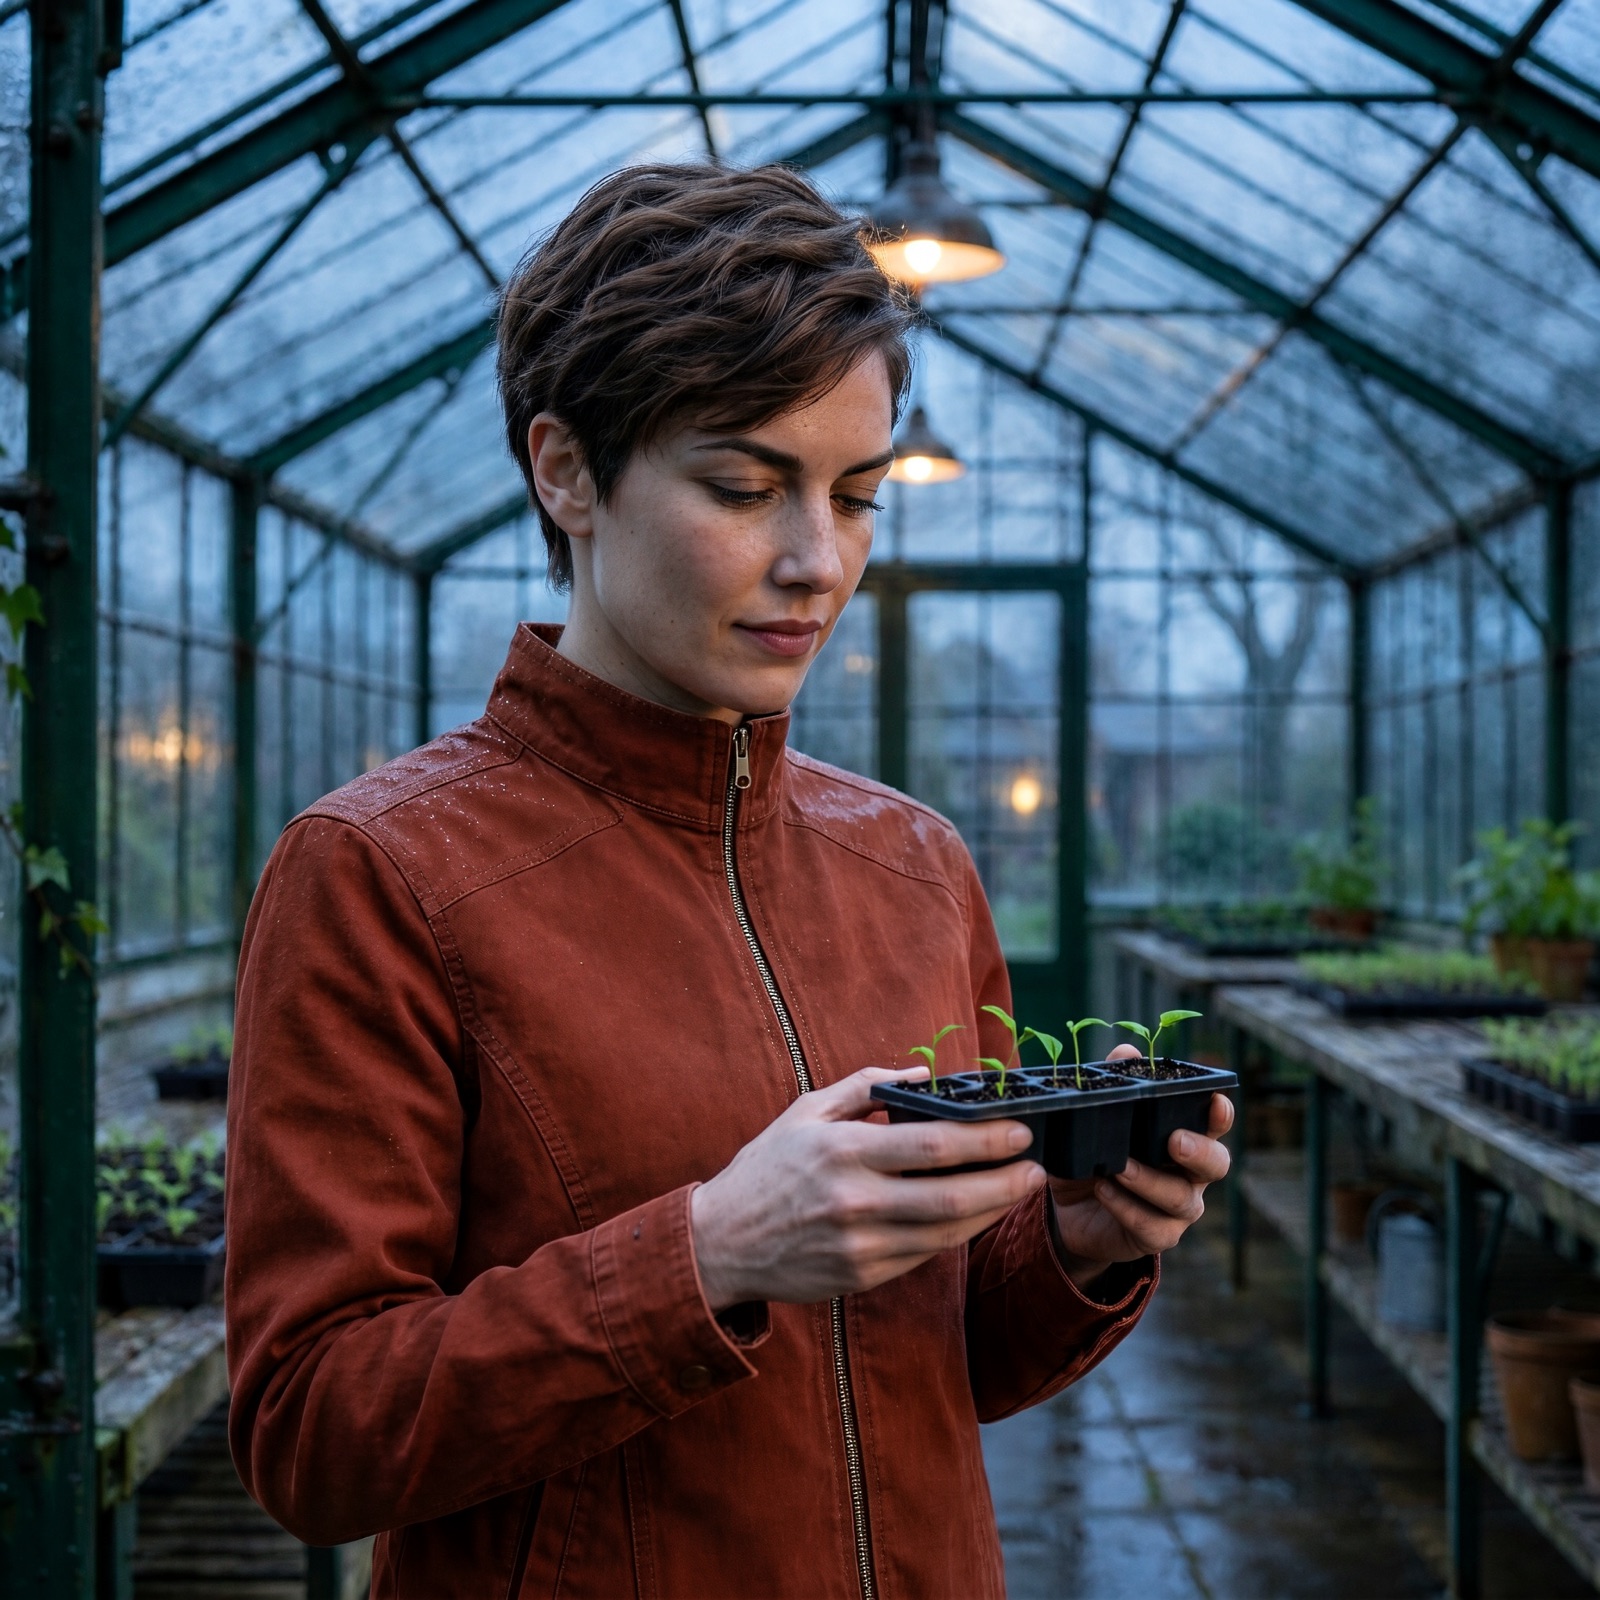
The frame picked up the rust-colored stand collar and the cool light of the glass greenhouse. Both hands are visible around the seed tray. The character is looking down at a three-quarter angle, so the hair part and facial proportions are harder to judge against the straight-on portrait.
Compare face shape, hair part and the jacket collar before generating another scene. For the next frame, reuse the original portrait and outfit images in the same positions. Change the scene reference and action. If you introduce an accepted generated frame as a new reference, give it a specific job such as pose, and keep the original portrait as the identity source.
3. Replace one object and preserve the layout
Upload in this order:
- The poster you are editing, with a mug on a shelf and a short headline.
- A clear photo of the cream ceramic vase you want to insert.

Image 1 · Base poster
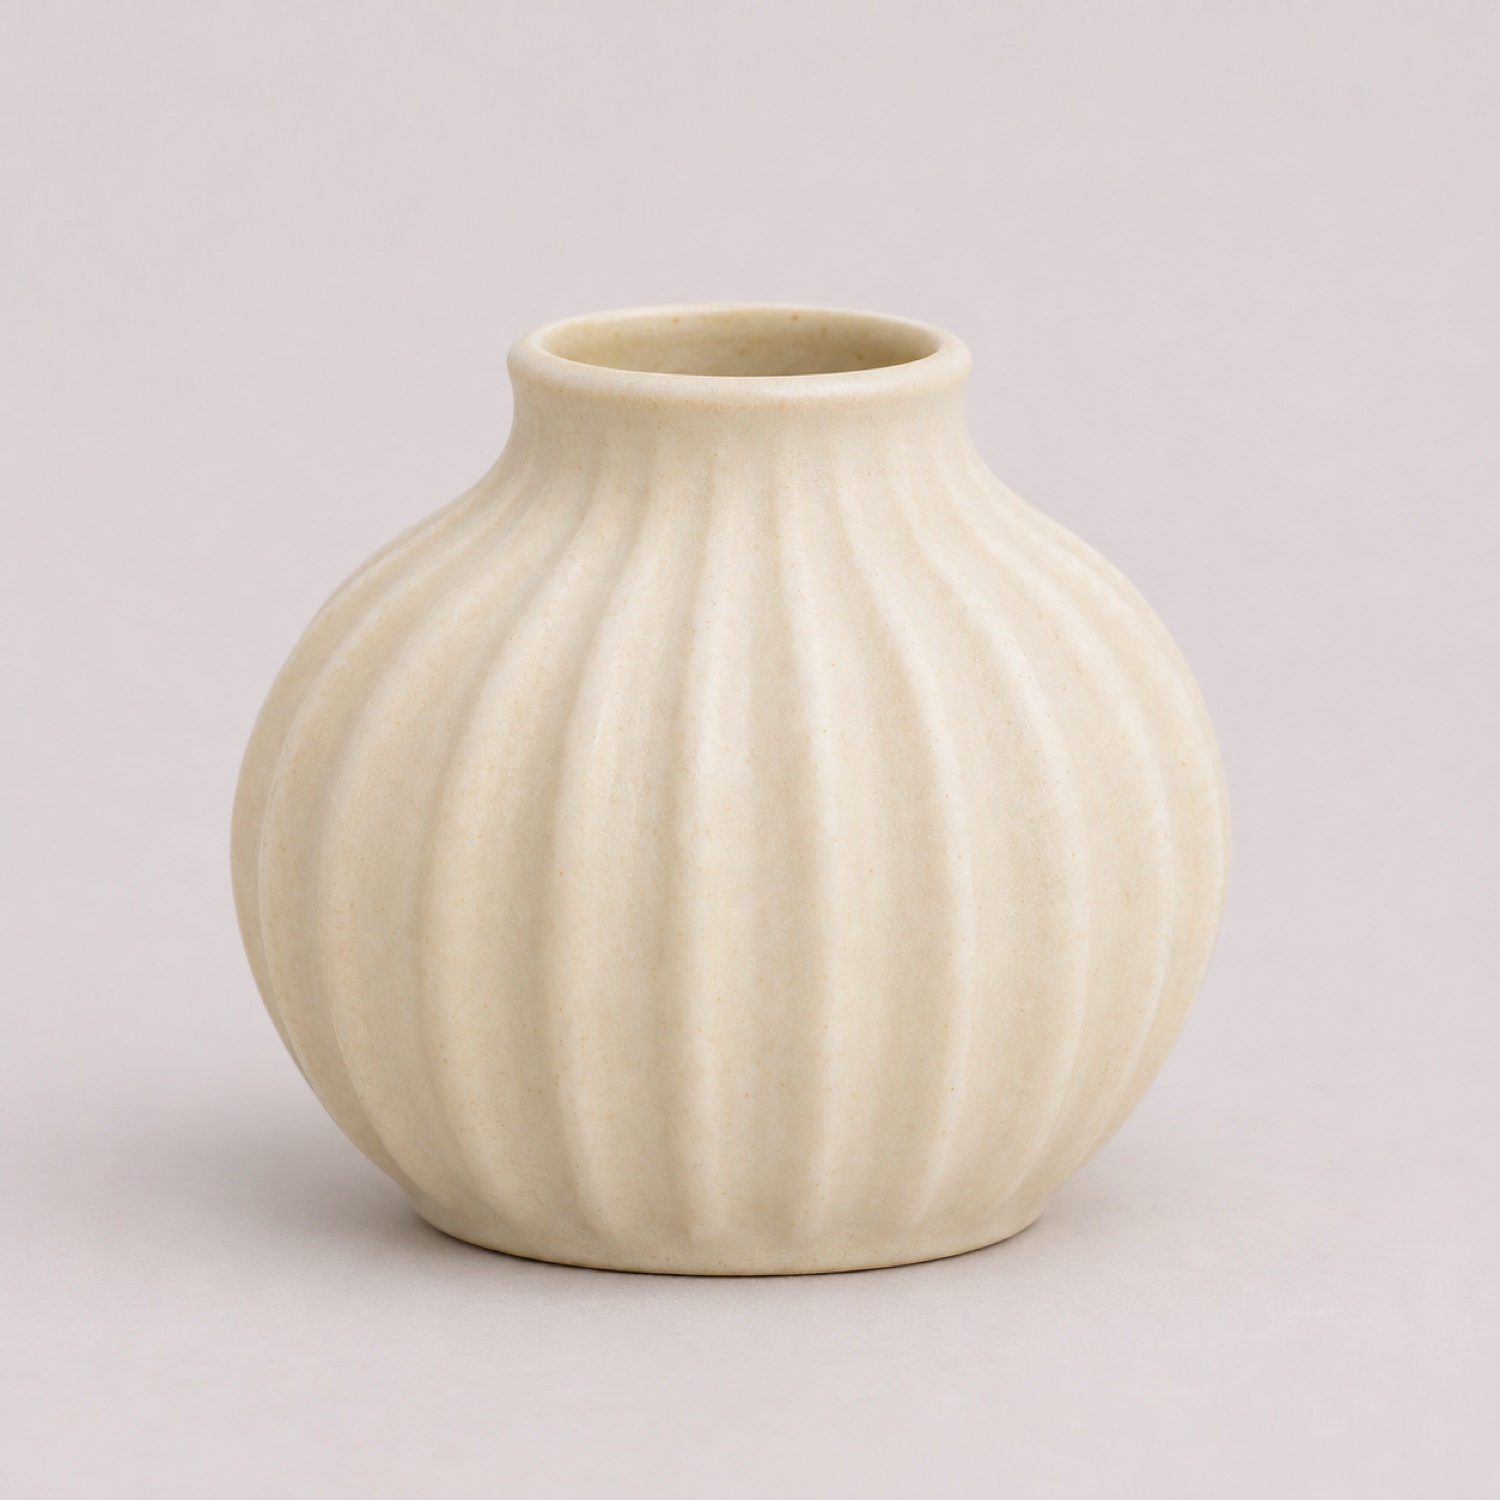
Image 2 · Vase reference
Use <Picture 1> as the base image.
Replace the mug on the shelf with the cream ceramic vase from <Picture 2>.
Keep the shelf position, camera angle, background, headline, and empty space
in the same places as <Picture 1>.
Match the existing light direction and give the vase a contact shadow
where its base meets the shelf.
Place the vase within the original mug area.
The vase replaced the mug, with a shadow falling to the right. The “STUDIO SHELF” headline and front edge of the shelf still line up at a glance. The green background darkened slightly, and the new shadow is more pronounced than the mug’s.
Compare the old and new images at the same zoom. Check the headline, the shelf line and the margin around the image. The official API describes an instruction-based edit and lists masked edits as unsupported. If the job requires pixel-for-pixel preservation outside a small area, finish the placement in a layer-based editor.
When more reference images help
Add a file when it contributes information the current set lacks. A side view helps when a product's connectors or handle are hidden in the front photo. A second image of the same character can show an unfamiliar angle. A room containing several exact pieces can use a separate reference for each piece. MiniMax's model card shows this with one empty room and nine separately referenced items.
新智元 reported a test using 16 images split across a character, equipment, and a workshop. The useful part of that setup is how the inputs were grouped. For a similar job, number the files before uploading, state which group controls each part, and choose one primary image within any group where the references disagree. Inspect the face, equipment and room separately in the result.
If you cannot say what a new image contributes, leave it out of the first pass. Bring it in on a second pass only when the current result shows a missing detail it can supply.
Fix the first thing that went wrong
| Symptom | First thing to change |
|---|---|
| The face resembles the outfit model | Crop the outfit reference to show just the clothing, or use a flat-lay photo |
| The product inherited the wrong color | Say which surface may change and which image owns the color of the enclosure |
| An extra object appeared from a style reference | Crop to the part that shows the style or lighting you need |
| The edit changed the crop or moved the headline | Explicitly keep the base aspect ratio, camera position and headline placement. Compare to the original at the same zoom |
| The model appears to have used the wrong file | Compare the upload order to every picture label. Fix the mismatch before changing the prose |
| Multiple edits made the scene drift | Go back to the original base image and apply one change at a time |
Keep the inputs, aspect ratio and output size fixed when testing a wording change. If your workflow exposes a seed, record it as well. Once the layout works, review the final file for small text, reflected objects, product geometry and any new detail that matters to the deliverable.
MiniMax's hosted API always enhances edit prompts. If a reference seems to have changed roles, check data[].revised_prompt to see the instructions the API used before you rewrite the whole brief.
Common questions
Do I need 16 images? Start with the fewest that describe the job. An edit to an existing picture can begin with one. Two or three are enough to assign identity, a borrowed detail and a scene in the examples above. Add a reference when it shows something you still need.
Can one picture control only the style? Yes. Name the visible qualities you want to carry over, such as a warm side light, a muted palette or a paper texture. Keep the subject anchored to a separate picture.
Does the first image always set the composition? The first image is numbered first. Its role comes from your instructions and the workflow you are using. For edits, explicitly say that it is the base and name what should stay where it is.
What if the interface only lets me upload fewer images? Use the limit shown in that interface. The 16-image figure is documented for the MiniMax API's image-edit endpoint. If you need a larger set, check a workflow that supports it before preparing the files.
More Posts

Camera Keyframes in H3 Max Multi Angle: A Working Guide
H3 Max Multi Angle takes four numbers per camera keyframe, not prompt words. What each does, the three that trip you up, and how to build an orbit that reads.


MiniMax H3 Turbo: 4 vs 6 vs 8 Steps, and Which LoRA
Four Turbo LoRA lines now compete to run MiniMax H3 in 4 steps. Which checkpoint fits your task, why both authors point at 6-8 steps, and what 5x faster actually means.

360 Product Video From One Photo: What It Replaces
A 360 product video used to mean a turntable and a shoot day. What one photo plus a camera trajectory can and cannot replace — with the limits stated up front.